The Best How To Use Clipping Mask In Photoshop 2022. Add layer click on the box with ‘+’ sign icon from the layer panel to add a transparent. The simplest use of a clipping mask is to combine two layers into one. Using a mask the process for using “clipping masks” is the same in photoshop and photoshop elements: A clipping mask is created using two layers of a photoshop image. Then drop that picture on the text and resize accordingly. Hold opt/alt on the keyboard, and when the pointer change it’s appearance to a downward pointing arrow and click between layers in the layer stack on the layer panel; Begin by dragging a photo over the mask. The shape in the bottom. Make sure that the photo. We will now learn how you can make a layer group and use them to make a clipping mask.
You can add any image to create a clipping mask. Cropping non destructively in photoshop. Using a mask the process for using “clipping masks” is the same in photoshop and photoshop elements: Now we will create a clipping mask. The bottommost layer, or base layer, defines the visible boundaries of the entire group. So to this, we will first select a picture that will use for clipping mask. Opening image the first thing you have to do is, open the photo you want to. Adjust the size of the image according to your choice and click the tick icon to secure. Let’s see how to use photoshop clipping masks to design amazing typography. The simplest use of a clipping mask is to combine two layers into one. Then drop that picture on the text and resize accordingly. A clipping mask is created using two layers of a photoshop image. The top layer will have a distinct shape that’s different from the bottom image that you want to merge it with. Go to file from the top left corner and click on open to open the file in photoshop. In the case of a layer mask, we paint the mask with black to make the pixels of the layer invisible; Alternatively, we could use a keyboard shortcut:. The shape in the bottom. How to use clipping masks photoshop: If the bottom layer has some pixels. We will now learn how you can make a layer group and use them to make a clipping mask. Hold opt/alt on the keyboard, and when the pointer change it’s appearance to a downward pointing arrow and click between layers in the layer stack on the layer panel; When we crop we dont delete pixels. Learn how and why to use clipping masks in photoshop to enhance your editing process. I selected the top layer in the layers panel and from the menu chose “layer” and “create clipping mask.”. To follow along as we explore clipping masks, watch the accompanying video. But in a clipping mask, we do the opposite. Make sure that the photo. Begin by dragging a photo over the mask. A clipping mask is a group of layers to which a mask is applied. Add layer click on the box with ‘+’ sign icon from the layer panel to add a transparent. Choose a font that you want to mask. Ok so the above example technically class as cropping non destructively, ie: The rule of clipping mask is to keep the text layer on bottom of the main image and then to use the. First, open a photo in photoshop. Sometimes the text layer gets on top of the main image (background copy layer).
Learn How And Why To Use Clipping Masks In Photoshop To Enhance Your Editing Process.
Add layer click on the box with ‘+’ sign icon from the layer panel to add a transparent. When we crop we dont delete pixels. The shape in the bottom.
But In A Clipping Mask, We Do The Opposite.
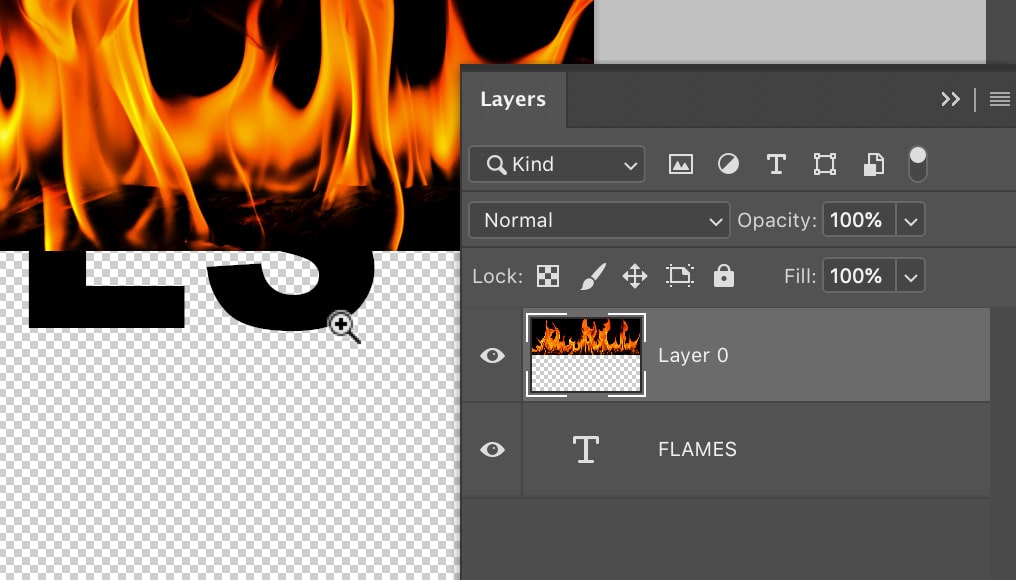
Now we will create a clipping mask. We will now learn how you can make a layer group and use them to make a clipping mask. The simplest use of a clipping mask is to combine two layers into one.
A Clipping Mask Is A Group Of Layers To Which A Mask Is Applied.
How to use clipping masks photoshop:


0 Comments